Exploring third-party services with webhooks

Hello!
Today, I want to show how the Webhooks feature of Secutils.dev can be used to explore third-party services from the outside, what a security researcher would call basic active reconnaissance. Reconnaissance is just a fancy word for gathering information about a target system to understand exploitable vulnerabilities and attack vectors. In this post our intent is innocent: we want to learn how a particular service implements a feature we like. The technique, however, is the same one a researcher would use.
Two things have changed since this post:
- The Tracking field on the responder form was renamed to Tracked requests (the underlying behaviour, "keep this many recent requests in the log", is the same).
- Secutils.dev now also supports two new responder modes that are even better for this kind of work:
- MITM responders that proxy requests to a real upstream service and let you inspect (and optionally modify) both the request and the response, plus a per-request response history.
- Per-user subdomain prefixes, so you can hand a third party a clean
myapp.webhooks.secutils.dev/...URL instead of a long path on the apex domain.
The walkthrough below still works, just with the friendlier UI labels.
The target: how Notion embeds links
I'll use Notion as the target. Notion has a sprawling API, but I'm specifically interested in how it handles embedding external content like web pages, links, and images.
I'm an avid Notion user. It's my go-to tool for note-taking and link collection, and I lean heavily on the Web Bookmark block, which gives links a neat preview card you can click to navigate.
It looks great. But how does Notion build that preview, and what does my server actually see when Notion crawls a link I paste? Let's find out.
For an introduction to webhook responders, see the Webhooks guides.
Step 1: a minimal HTML responder
First we need a URL Notion can crawl, served by us so we can inspect every request. Set up a tiny HTML responder:
- Navigate to Webhooks → Responders and click Create responder.
- Configure it with the following values:
| Name | |
| Tracked requests | |
| Headers | |
| Body | |
- Click Save. The responder appears in the grid with a unique URL.
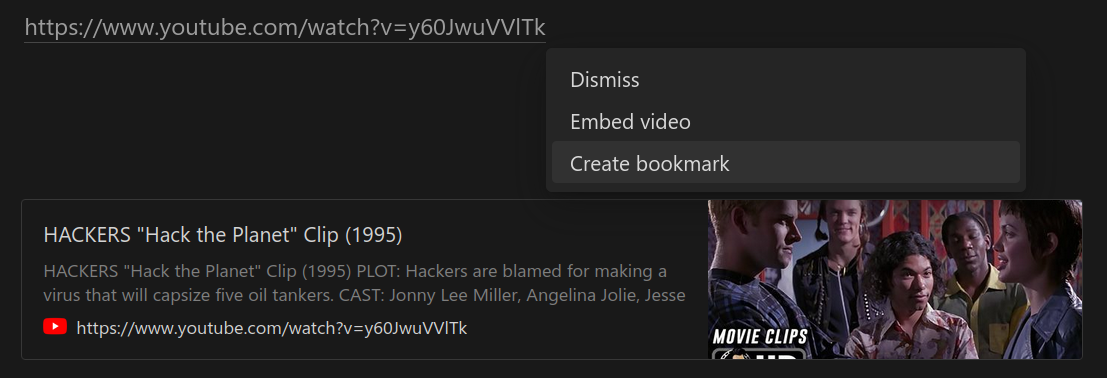
- Copy the URL and paste it into Notion as a Web Bookmark.
The result:

Not great. No title, no preview image. Let's see what Notion actually sent us:
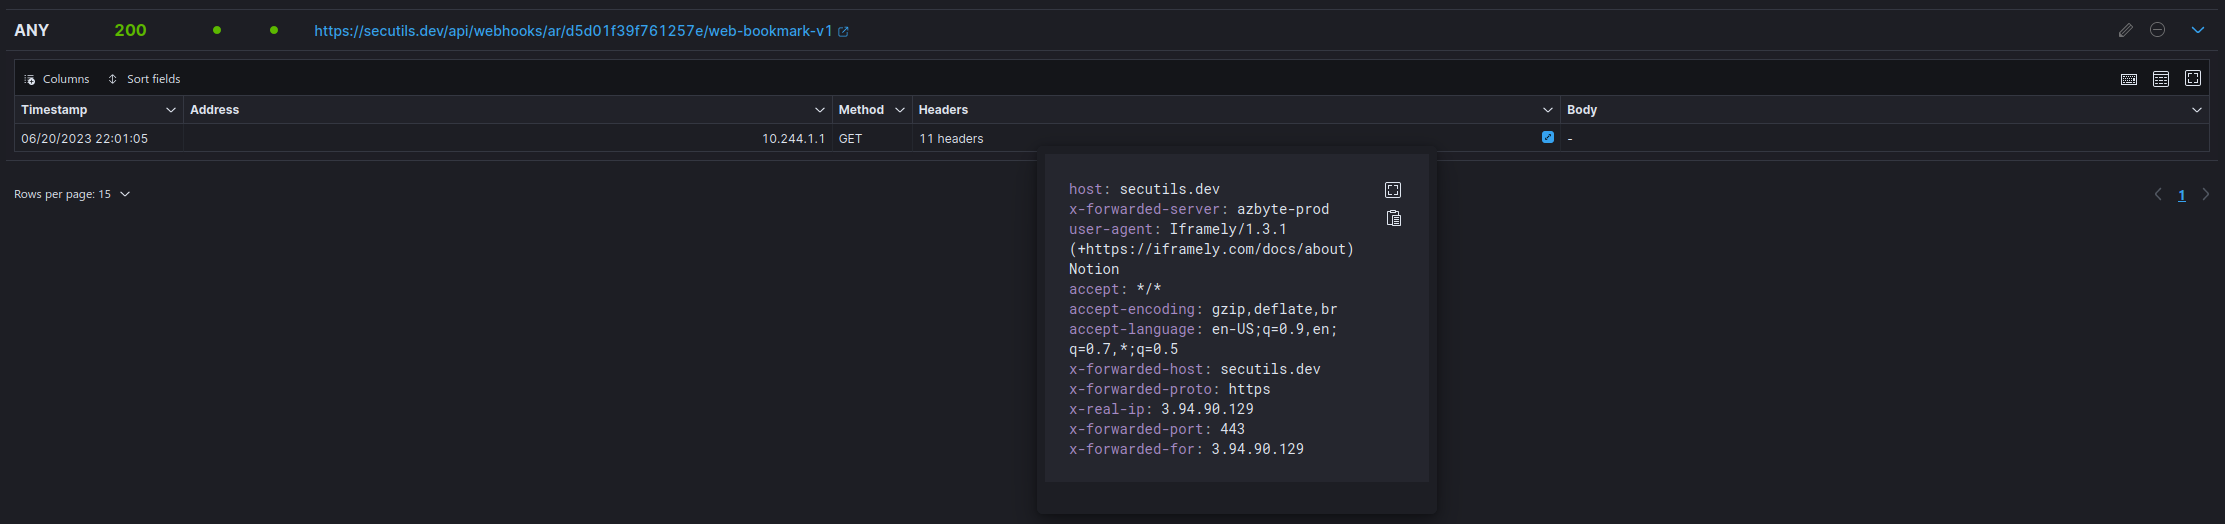
Inspecting the headers: Notion outsources link previews to Iframely.
If I were doing real reconnaissance, this is where I'd:
- Subscribe to the Iframely GitHub repository and skim its open issues.
- Do the same for Iframely's critical dependencies.
- Note the version in the User-Agent (
v1.3.1from 2019, in this snapshot). It looks tempting until you realise Iframely keeps that header static across versions, so it's a false signal. - Note the client IP, which
ipinfo.ioresolves to AWS infrastructure. Could be useful context later.
Less interesting for a bookmark experiment, but exactly the kind of detail that matters in a real assessment.
Step 2: get the rich preview
Back to my actual goal: I want a nice preview. The User-Agent helpfully points at Iframely's docs, which tell us all we need is a few <meta> tags:
<meta property="iframely:description" content="Hello from Secutils.dev Webhooks!" />
<meta property="iframely:image" content="https://avatars.githubusercontent.com/u/1713708?v=4" />
<title>My Mega Title</title>
Notion (and Iframely) cache previews aggressively, so to bust the cache we'll create a new responder rather than editing the first. Same shape, with the metadata added:
| Name | |
| Tracked requests | |
| Headers | |
| Body | |
Result:

A small but worth noting detail: Notion renders the image directly from iframely:image. We control that URL, so we control the image content on the user's bookmark at any future point. The phrase "PNG steganography" comes to mind. 😉
Step 3: try an embed instead
Embeds are different from bookmarks: instead of a preview card, Notion renders the page in an iframe. Create yet another responder with the same content, then use the Create embed option in Notion. This time three requests show up in the responder log:
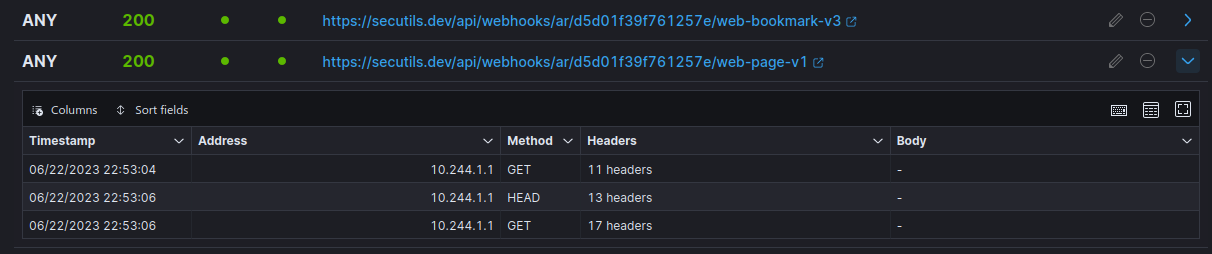
- The same
GETfrom Iframely, fetching link metadata. - A
HEADrequest from a user agent namedNotionEmbedder. - A final
GETfrom the user's browser, fetching the content rendered in the iframe.
Now look at the headers of that HEAD request:
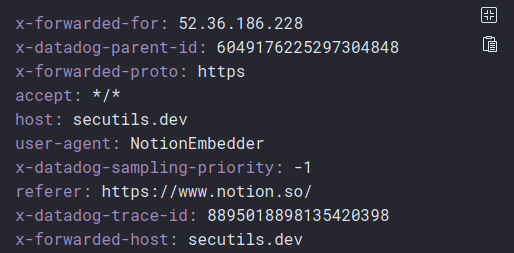
Likely Notion is verifying the embed target is reachable before showing it to the user. The x-datadog-* headers tell us Notion uses DataDog Synthetic APM for the check. With our researcher hat back on, that's another vendor whose security advisories we'd add to our monitoring list.
Going further: MITM responders
Plain "log everything" responders are great for inspecting what arrives. MITM (Man-in-the-Middle) responders go a step further: they proxy the request to a real upstream and let you inspect and modify both the request and the response, building up a per-request response history as you go.
That makes them ideal for:
- Reverse-engineering a third-party API on the wire.
- Capturing payloads that a SaaS product sends to your service in CI.
- Quickly stubbing or rewriting parts of a third-party response while testing an integration without touching production.
The MITM responder UI lives in the same Webhooks workspace, see the Webhooks guides for setup.
Wrap-up
When a third-party service offers any kind of "embed" or "preview" feature, it tends to expose a surprising amount of operational detail to the URL it crawls. A throwaway responder is one of the cheapest reconnaissance tools you can wield. Used responsibly (only against your own properties or with explicit permission), it's also a great way to learn how the rest of the modern web is wired together.
Frequently asked questions
Is using webhook responders to inspect third-party services legal?
Inspecting requests that a third party makes to a URL you control is just looking at logs of your own server. Where things get risky is using this to actively probe systems you don't own. Stay on the right side of authorisation and applicable computer-misuse laws.
What's the difference between a basic responder and a MITM responder?
A basic responder serves a fixed body (or one computed by a JavaScript script) and logs the incoming request. A MITM responder also forwards the request to an upstream URL, captures the upstream response, and lets you modify either side. Useful for "see and rewrite what this third-party API sends my service".
Can I use my own subdomain instead of a long path?
Yes. Configure a subdomain prefix on the responder and Secutils.dev will route traffic on <prefix>.webhooks.secutils.dev to it. Much cleaner for sharing with a third party.
That wraps up today's post, thanks for taking the time to read it!
If you found this post helpful or interesting, please consider showing your support by starring secutils-dev/secutils GitHub repository. Also, feel free to follow me on Twitter, Mastodon, LinkedIn, Indie Hackers, or Dev Community.
Thank you for being a part of the community!